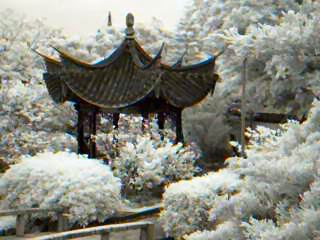
Everything you need to take stunning high resolution IR photographs - Camera, Lens, IR filter, 1GB SD card plus software. How much will it all cost?.........oh, around £19.99!!!
Either build it yourself as a project (recommended) or, if you're really struggling, leave me a comment and I can build it for you and list it on eBay with a CD containing this tutorial and all the windows software.
Interested? Read on......
-What is infrared (IR) photography why would I try it?-
On the spectrum of colours, infrared light is the colour which is below red - ultraviolet is the one above violet. Both infrared and ultraviolet are naturally invisible to humans. Digital IR photography uses the light sensitive digital sensor (called a CMOS) to detect the nearest band of IR light energy.
There are some animals and insects which can see these bandwidths naturally (wasps can see ultraviolet UV light for example). Contrary to belief, these are not colours, they are effectively invisible but whatever medium we use to see them can give them colour tint or we can artificially add colour to them afterwards to make the image more pleasing to look at.
These brilliant, crisp and often surreal images with striking clarity and contrast often enhance an otherwise mundane picture. While there are several simple software techniques to make any of your normal digital photos look "like" an IR photo, ultimately nothing really is 'like' the real thing.
For years now people have been aware of and been able to photograph these invisible bandwidths of energy. If you're into photography, even if you just enjoy taking snaps (which is what photography is all about - let's face it), there will come a point when you see and fall in love with Infrared photography.
-Isn't IR photography a toy only enjoyed by wealthy camera connoisseurs?-
The problem is (up until reading this blog), as with most applied photography techniques - it's very expensive to get even the cheapest gear which will produce fine IR photographs. This blog is dedicated to producing real high resolution digital IR photography on a VERY TIGHT BUDGET - now anyone can film the trees and skies in infrared!!
Many of your photography buddies and professionals in the trade will doubt me and tell you that it is impossible to get decent IR photographs with my filter method (as they told me when I suggested it). Applied photography is normally very expensive but truest me, it works!
I will show you which camera is best and how to modify it by simply replacing the manufacturers filter by using FREE materials. Extensive step-by-step tutorials explain how to convert the camera, upgrade it in the future and how to take breathtaking high-resolution images, including Post processing tips and a Panorama How-To.
I have included links to all the free software tools (for both Windows and Linux systems) helping to speed up the process, making things as easy as possible for you.
-Why not use my super-duper Digital SLR and fantastic zoom-lens?-
1- with an SLR, the filter makes the viewfinder pitch black making it almost impossible to quickly compose a shot. With my method, you can clearly see the image through a viewfinder, making composition and framing not only possible but quick and very simple.
2- an SLR will require tripod stabilizing and long-exposure times. This can be frustrating, involving extensive trial and error and guess-work. With mine, the images can be taken instantly making it easy to photo wildlife, people and action shots.
3- My method also supports video mode, allowing for unusual footage to be captured and also enables almost infinitely HUGE resolution IR images (without the expense of an SLR and additional lenses!).
4- It also Natively supports vertical and horizontal Panorama shots making it as easy as moving the camera left and right or up and down and stitching the images together automatically on a computer (again, no need for an extra, expensive Panorama lens).
5- The Photos look great straight from the included SD memory card. (No tweaking of RGB and curve levels required - unless you particularly want to).
6- Many expensive lenses produce a large, intrusive hotspot in the centre of your image and most auto-focus cameras will only produce blurred pictures. The cheap, built-in lens of this camera is perfect for IR photography; VERY GOOD images with little distortion.
7- Expensive sensors are far less sensitive to IR light - this cheap digital CMOS sensor is perfect for IR photography too. In fact, cheap sensors are so sensitive to IR light that the manufacturers have to place an IR blocker behind the lens to make it suitable for normal use.
The Camera
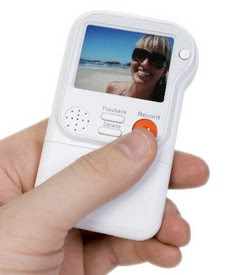
The best camera for this purpose I have found is the "Busbi" fixed lens, hand-held point and shoot Digital Video Camera. It retails in the UK for as little as £19.99 and includes a 1GB SD card, built-in Microphone, 640 x 480 (pixel) CMOS sensor, 3" back-lit LCD viewfinder, 2x AA batteries, on-screen battery display and photo management, fast automatic luminance balance (very important), free editing software and a carry-strap. Great value!
-Why use a video camera...and with such low resolution?-
1- value is exceptional (I know, it's a shame that there's no zoom as well).
2- camera is far easier to convert than any other I've done.
3- resolution isn't really important (optionally, we'll be stitching several 640 x 480 images to make one bigger image - sounds like a pain but the software does it semi-automatically!)
4- camera is easier to use for infra-red (you'll be amazed at how easy it is to compose great shots!)
5- can create panoramic shots in seconds (literally a couple of seconds creates a HUGE pan)
6- acts as a built-in sports mode (grab the frames you like and discard the others)
7- results are far, far better quality than the more expensive still cameras I have converted using the same method.
The Infrared filter
I devised a way to make a free IR filter - even though you may dubious, it works (see footage):
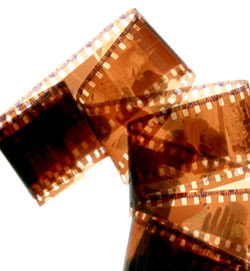
filmed using my free IR filter method!
To make your own free IR filter, get a strip of blank, exposed and developed film negative - you know the blank, brown strip on the left when you get your processed film-strip (not the unexposed black portion at the very edge but the browny-orange bit just before the photo negatives start). Ask the chemist if you're not sure; they discard these anyway so they will give it to you for free but you should DEMAND a piece that isn't scratched. They will be confused but surprisingly helpful.
There are also many professional IR filters - Cokin and Hoya being the 2 main competitors. I have since bought and fitted (using the same method as above) a Cokin p007 (89B) infrared filter. I am very happy with the results (see footage):
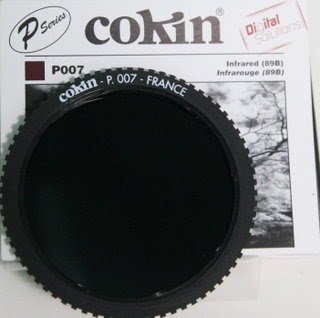
filmed using the Cokin P007 (89B) IR filter!
The Cokin Poo7 Infrared (89B)/Infrarouge (89B). This blocks even more visible light and gets professional quality results BUT it is £32.99! This filter is quite large and you will only need to use a tiny piece of it so it will come in handy for many conversions in the future.
-Why would I use a scrap piece of film and not a 'proper' filter?-
The free method produces very good, exciting results with only some 'slight' visible light which can be tweaked out on a PC if you decide (note though that this also happens on expensive Digital SLRs even using expensive IR filters so don't worry too much!). The images have a quirky raw and ethereal feel which some people quite like (myself included). The main purpose of this blog is to provide applied IR photography on a budget but of course you can use a more expensive filter if you prefer.
The Cokin produces far better results and filters out almost all visible light. The images are almost black and white but again can be tweaked on a PC to suit (some people even add colour back in to the image afterwards using a technique called False Colouring on a PC). Whilst the differences in quality are noticable, so too is the price. Like me, you may want to look into investing in a more expensive filter in the future or hunt for a cheap second hand one? For now though, I would advise using free method to whet your appetite (although the procedure is exactly the same for whichever filter you have decided to use).
Tools
For dismantling and converting the camera, you will need:
1- a small watchmakers screwdriver (to undo the casing and remove the filter)
2- some pliers (to unscrew the glued lens-housing)
3- some lens wipes/duster brush (optional - to remove dust and prevent static)
4- scissors (to trim the film negative)
4- some fablon (optional - to replace the front sticker/decal)
Conversion procedure
-IMPORTANT- only convert the camera in NATURAL LIGHT. This allows you to see clearly what you are doing and it will be impossible to focus the lens in either dim light or in artificial light.
2- remove the battery cover, any batteries and SD card.
3- remove all the screws (using a cross-headed watchmakers screwdriver).
4- carefully separate the two halves of th casing (DON'T PULL TOO HARD! The circuit board is attached to the back half and the lens and microphone are attached to the front half by THIN wires)
DON'T panic - you're 1/3 of the way through already!
5- using pliers with force, remove the lens-housing by u
6- look at the back of the lens you just removed and crack the pearlescent-blue/green/purple square with the watchmakers screwdriver and flip it out and discard it.
7- cut a circle of exposed and developed film negative and poke it into the hole in the lens-housing (where the filter was that you just removed) try not to scratch or finger-print the sensor, filter or lens (carefully clean them with a lens tissue if in doubt).
BREATHE - you're 2/3 of the way through now!
8- carefully replace the batteries (observing the correct polarity) and switch on using the small button, still being mindful of those THIN wires ;)
9- Point the camera at a subject - WOW, it's in In
10- Great, now remove the batteries and carefully clip the two halves back together being VERY CAREFUL not to trap those THIN wires in front of the lens (just guide them out of harms way with a finger as you close the casing) - also try to feed the carry strap and the SD card's slot-cover back into their grooves before you snap the casing shut.
11- Remove the batteries again and replace all the screws.
12- Joke, replace the batteries and switch her on, YAY!!! If you want, you can replace the sticker with a piece of fablon/sticky-backed plastic (A small aperture will need to be made for the microphone but the LED will shine through the fablon anyway so you don't need to make a hole for that unless you really want to).
-Which subjects make for the best IR photographs?-
This is something which is open to debate and is really down to your own personal taste. I am sure you will have no end of fun and it will change your approach to photography in general, adding more spice and variety. As I stated at the start of this blog, IR cameras can make great photos out of otherwise mundane pictures. Almost any IR shot will be interesting in it's own merit. As a quick tip, skies appear as vast dark expanses populated by striking white clouds. Trees, plants and flowers are also brilliant white so a tree, for example, shot with a sky in the background looks particularly impressive. You will find, through experimentation, that not all is as it seems. The IR camera sees the world in a completely different and often unexpected way. It is quite exciting to find these 'anomalies' for yourself ;)
-How do I take Infrared photos with the camera?-
Filming a Snapshot (point and shoot image)
Requiring the least preparation and hassle, these snapshots are extremely quick and easy to take but are fairly low quality and detail.
1- switch on the camera (small button top right).
2- watch the viewfinder screen to compose the image.
3- move the camera around to find an interesting image.
4- press the red button and allow to record for about 2 seconds.
5- press the red button to stop recording after about 2 seconds.
Filming a High resolution Image
Required for enlarging and printing pictures with much higher quality and detail (eg Large prints, artwork and posters etc.).
1- switch on the camera (small button top right).
2- watch the viewfinder screen to compose the image.
3- move the camera around to find an interesting image.
4- press the red button and allow to record.
5- gently move the camera around the image to capture a grid of 9 frames.
5- press the red button to stop recording after you've captured all the frames.
Filming a Panoramic Image (Panorama)
This is useful for capturing either a very tall scene (eg: pegodas, church-spires or sky-scraper etc.) or a very wide scene (eg: a beach shore, a horizon or tree-line etc.). This method can also be used to create a 360 degree panorama (to be viewed with the free photostitch viewer) where the scene is looped seamlessly in a complete circle.
1- switch on the camera (small button top right).
2- watch the viewfinder screen to compose the image.
3- move the camera around to find an interesting image.
4- press the red button and allow to record.
5- gently move the camera either vertically (|) or horizontally (-) the camera can even be moved in a complete circle!
5- press the red button to stop recording after you've captured all the frames.
-OK great, so I have all this IR video footage - what now?-
Extracting (grabbing) your video frames as photos
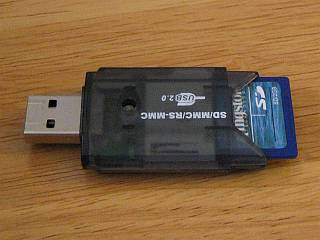
1- insert the SD card into your computer (if you don't have an SD card slot, £Poundland/Poundworld sell decent SD card-readers for only £1). Open the folder "100DSCIM" and copy the footage to your Harddrive.
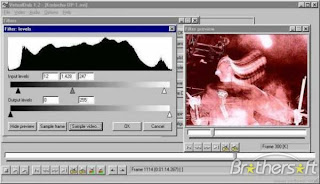
2- download a free software called virtualdub (http://www.virtualdub.org/download.html) and run it (no need to install it).
3- open your video footage and move the slider around to select the best frame (whichever looks best) and right click 'file' and click export frame as JPEG.
Using this method allows you to store potentially thousands of images in one convenient avi file if you consider the software to be a fancy thumbnail previewer! Also , for people who like to tag their images with a soundbyte, the camera's microphone records the actual sounds heard at the time of taking the photo - these can be extracted as mp3 (using virtualdub) and later tagged to the photo.
Enhancing the photos' colour and contrast etc.
Although the images look great in their raw format, straight off the camera, you may want to tweak the levels to make it look a certain way:
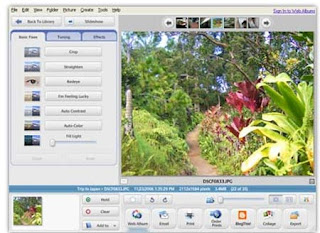
1- open the photo with the free photo editing software (http://picasa.google.com/thanks.html)
2- select "feeling lucky" for a one-click autofix.
3- in some cases (especially when using the free IR filter method) you can get interesting results by manually adjusting the red/green/blue colour channels in the palette mixer - especially the red and blue channels!
In addition to using automatic photo-fix (which works well), you could choose to play around with the various levels manually to make it more vibrant, abstract or black and white/sepia/gold etc. Brightness and contrast levels can adjust the image to 'pull out' or 'blend in' subtle details.
There is also a process called "false colour" which is meant to inject 'normal' colours back into the IR image (it should work with all greyscale/black & white/sepia images too). A colour gradient is applied and assigned to 3 separate colour chanels of Red/Green/Blue and then merged back into the primary image. I have researched this extensively but, as yet, cannot get it to work as intended.
Making panorama shots (a long picture which can span 360 degrees)
-IMPORTANT- This requires that you have footage which either 'pans' from left to right (or right to left) or 'tilts' from down to up (or up to down).
1- grab the first frame as before and skip the video to the edge of that frame (allowing for a small portion of overlap - see images below) and grab the second frame...
2- repeat this until you've grabbed the last frame.
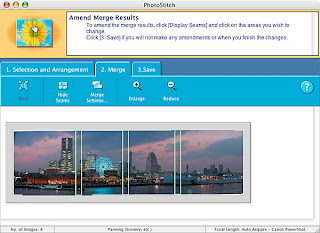
3- download and open up Canon photostitch (http://download.cnet.com/Canon-Utilities-PhotoStitch/3000-18489_4-199151.html?tag=mncol;pop)
4- load in ALL the grabbed frames.
5- drag them to arrange them in a logical order (so that all the overlapping edges line up with one another - see image below).
6- tell the software if this is a horizontal (-) or vertical (|) pan.
7- select merge. Done! The software magically stitches them together and crops the image to straighten it for you.
Making patchworked high resolution images (instead of just 640x480 pixel photos)
Although great, you will notice that the photos are small due to the low resolution of the camera. Don't worry, you can increase the resolution almost infinitely! -IMPORTANT- This requires that you film your subject as pictured below.
1- start the film in the top left corner of your subject and pan to the top right. Drop down slightly and pan from right to left. Repeat until the entire subject is covered.
2- grab the first (left to right) pan as described above and create a panorama (as described above).
3- grab the second (right to left) pan and create another horizontal panorama.
4- grab the third and last pan (left to right) and create another horizontal panorama.
5- load all the panoramas into photostitch and use them to create a vertical panorama which will now be one huge, high resolution image (made of 9 smaller images).
This method can be used to make one image from hundreds of others to create a phenomenal patch-worked image which would cover your walls!
-Do I print them in colour or Black and White?-
Depending on the image itself will determine whether or not to go for colour or black and white. One thing worthy of note is a print process called "silver monochrome"; if you've taken a stonking picture, it's worth paying the extra to get it printed on silver paper in black/monochrome - it just looks awesome!
-What else can I use the IR camera for?-
In addition to taking stunning photos, there are many other practical and fun applications for this IR camera
1- night vision (using a torch made from Infrared LEDs or a shop bought IR lamp as an illuminator, you can see in the dark - the IR lamp is otherwise invisible to humans, like the beam from a TV remote).
2- it can be used as a day/night surveillance camera for a property, filming burglars invisibly in the dark with an IR lamp pointing at the entrance to your property! Could also be used to film nocturnal wildlife - a strong 65 degree IR bulb can invisibly illuminate up to 120 meters!
3- it can see your veins 'inside' your body!!! (This is an historical medical application but scared the cr@p out of me when I discovered it by accident! Fascinating. Also turns eyes a freaky jet-black from a distance. Hopefully good for spotting Alien and Zombie imposter's during the impending Alien Invasion/Zombie Apocalypse).
4- it illuminates foliage as bright white but is not fooled by Disruptive Pattern Materials (DPM) and other camouflage which is depicted as a dark grey. (As a military application, it can be used to 'see' camouflaged targets, making the 'hidden' person stand out like a sore thumb).
5- with the Cokin filter fitted, all visible light is blocked so it can be pointed directly at our Sun which generates some unusual effects - the Sun becomes eclipsed with a halo of light emitting from it!
6- although this is not a 'thermal imaging' camera, by any stretch of the imagination, it is extremely sensitive to heat. (It picks up cigarettes on the floor, matches, cooker hobs etc - all which look extinguished/cold to the naked eye but fiercely illuminate the viewfinder! I filmed a Chinese New-Year Lantern for over 3 minutes as it flew through the air. The camera picked up the heat source even though its candle had extinguished and was no longer visible to the naked eye.)
6- there are other suggested applications for sighting 'UFOs' in the Near infrared spectrum which are invisible to the naked eye.
7- as infrared cameras ignore normal light and shadow, detail in IR photos is particularly obvious. IR photography is sometimes used in engineering or forensic science to capture essential detail which may be overlooked by normal cameras.
-Are there any further alterations I can make to the camera?-
Of course, you may devise many modifications to improve this basic concept - please feel free to post your ideas here for others to share. Here are a couple more options that I am aware of:
Battery modification
depending on your skills, you could incorporate a re-chargeable Lith-ion battery for longer life and reliability or use high mAH (2000+) rechargeable batteries for value.
Zoom lens mod
it is possible (with difficulty) to fix a small, manual zoom lens and correcting lens onto the housing.
Wide angle lens mod (captures a 'wide' image in one photo)
Using a cheap door spy-glass, cut the brass tube off and offer the lens up to the camera to create a simple wide-angle effect.
Macro lens modification (for close up shots)
Hold the lens (from an eye-piece of an old pair of binoculars) to the front of the cameras lens to introduce a simple macro facility.
Mag-mount plate (for Macro & Wide-Angle lens mods)
Get a keyring loop and hot-glue it to the inside the camera around the lens (DO NOT GET GLUE ONTO THE LENS!). Buy some 'small' magnets and fit 4 of them to the base of each peripheral lenses so they line up with the keyring loop. The lenses will now smartly attach to the camera when offered up! You can cover the magnets with felt/rubber so it looks more professional.
"X-Ray" camera mod (untested)
during my research, I read that if a night-shot camera is converted using this method it reportedly becomes what is know in the Military as an X-ray camera. (As it becomes even more sensitive to 'reflected' infrared light so it can see 'through' many things which the human eye cannot - for example finding and filming fish through a lake or seeing through certain fabrics such as blinds and curtains etc.). Although I haven't attempted this yet, in theory it should work.
Ultraviolet photography (untested)
another concept which I've developed is Budget Ultraviolet Photography. Another surreal type of photography where flowers and insects and leaves etc display intricate, invisible patterns and markings! I imagine this would work, although I've not tested it as yet -
1- get a Black-light bulb for a £couple, wrap it in a tea-towel and break it once firmly with a hammer.
2- find a suitably sized flat piece of glass, file it to shape and place it in the lens-housing instead of the IR filter (as described earlier.
3- re-focus the lens manually (as described earlier).
Free Windows Software:
Virtualdub - Extract Image from video
http://www.virtualdub.org/download.html
Photostitch (Windows) - Create Panoramas & Patchworks
http://download.cnet.com/Canon-Utilities-PhotoStitch/3000-18489_4-199151.html?tag=mncol;pop
Picasa - Edit/Tweak/Touch up images
http://picasa.google.com/thanks.html
ALL linux software is free anyway:
PiTiVi - Extract Image from video
Panorama - Create Panoramas & Patchworks
Picasa - Edit/Tweak/Touch up images
GIMP - Manipulate images
Thanks for reading - good luck!
Comments please - Anonymous/Non-Members comments welcome :)
